
Emerson Sensi Installation Manual: A Comprehensive Guide
This manual details the Emerson Sensi thermostat (models 1F87U-42WF, 1F76U-22WFB) installation process,
covering pre-installation, wiring, app setup, and troubleshooting for optimal performance․
It includes guides from March 2016 and September 2015, offering comprehensive instructions for a smooth user experience․
Understanding the Sensi Thermostat
The Emerson Sensi thermostat represents a significant upgrade for home climate control, offering smart features and energy savings; Available in models like 1F87U-42WF and 1F76U-22WFB, the Sensi simplifies temperature management through its intuitive design and mobile app connectivity․
Unlike traditional thermostats, Sensi learns your heating and cooling preferences, creating a customized schedule to optimize comfort and reduce energy consumption․ Key features include remote access via the Sensi mobile app, geofencing capabilities, and compatibility with various HVAC systems․
Understanding the thermostat’s basic functionality – including manual operation and menu configurations – is crucial before installation․ The “Manual Operation Guide” (Version: March 2016) provides detailed insights into these aspects․ Successful installation, detailed in the September 2015 guide, ensures you can fully leverage the Sensi’s smart capabilities for a more comfortable and efficient home environment․
Sensi Model Variations (1F87U-42WF, 1F76U-22WFB)
Emerson offers several Sensi thermostat models, with the 1F87U-42WF and 1F76U-22WFB being prominent examples․ While both provide smart climate control, key distinctions exist․ The 1F87U-42WF generally includes more advanced features, such as broader compatibility with HVAC systems and potentially enhanced smart home integrations․
The 1F76U-22WFB, often referred to as the “Sensi Lite” model, offers a streamlined experience focusing on core smart thermostat functionalities at a more accessible price point․ Installation procedures are largely consistent between the models, but it’s vital to consult the specific installation guide accompanying your purchased unit․
Regardless of the model, both Sensi thermostats require a compatible HVAC system and a stable Wi-Fi connection for full functionality․ Understanding your specific model number is crucial for accessing the correct documentation and ensuring a successful installation process, as outlined in the available guides from September 2015 and beyond․
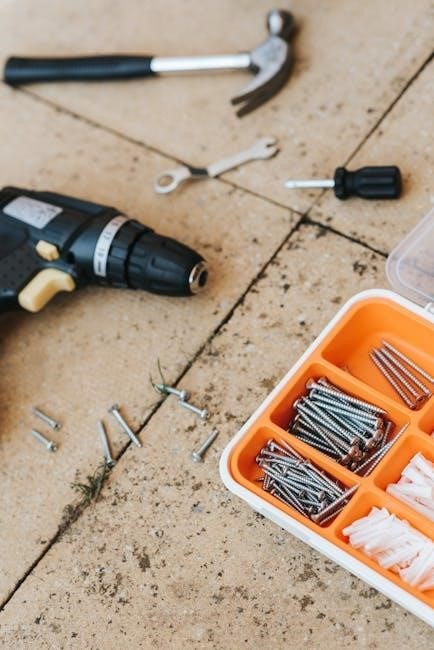
Required Tools and Materials
Successful Emerson Sensi thermostat installation necessitates gathering specific tools and materials beforehand․ A Phillips head screwdriver is essential for removing the old thermostat and securing the Sensi base plate․ A small flathead screwdriver may be needed for certain wiring connections․ A wire stripper/cutter is crucial for preparing wires, especially when a Common wire kit is utilized․
You’ll also require a level to ensure the Sensi base is mounted straight․ A pencil for marking screw holes is helpful․ Depending on your existing wiring, an Emerson Thermostat Common Wire Kit might be necessary – particularly in systems lacking a common (C) wire․
Don’t forget the Sensi thermostat itself, including the faceplate and base plate․ Finally, access to the Sensi mobile app (downloaded on a smartphone or tablet) is vital for setup and configuration․ Having these items ready streamlines the installation process, as detailed in the installation guides․

Pre-Installation Steps
Before installation, prioritize safety by disconnecting power to your HVAC system․
Identify existing wiring and confirm compatibility with the Sensi thermostat for a seamless setup․
Safety Precautions & Power Disconnection
Prior to commencing any installation work, utmost care must be taken to ensure personal safety and prevent damage to your HVAC system․ The very first and most crucial step is to completely disconnect power to your heating and cooling system at the breaker box․ Do not proceed with the installation if you are uncomfortable working with electrical wiring․
Confirm the power is off using a non-contact voltage tester at the thermostat wires․ Even with the breaker switched off, double-checking is essential․ Failure to disconnect power can result in electrical shock or damage to the thermostat and HVAC equipment․
Always read and understand all safety warnings and instructions provided within this manual and any accompanying documentation․ If you are unsure about any aspect of the installation, consult a qualified HVAC professional․ Remember, safety is paramount throughout the entire process․
Identifying Your Existing Wiring
Before disconnecting any wires from your old thermostat, carefully document the existing wiring configuration․ This is a critical step for a successful Sensi installation․ Take a clear photograph of the wiring connections as they currently are․
Label each wire with the corresponding terminal designation on your old thermostat (e․g․, R, W, G, Y, C)․ This labeling will be invaluable when connecting the wires to the Sensi base plate․ Pay particular attention to wires connected to the ‘RC’ and ‘RH’ terminals – these must be labeled separately as the Sensi thermostat requires individual connections․
If a jumper wire connects ‘RC’ and ‘RH’, note its presence․ The Sensi installation often requires clipping this jumper wire on the back of the Sensi faceplate․ Accurate identification prevents miswiring and ensures proper system operation․
Checking Compatibility with Your HVAC System
Ensuring compatibility is crucial before installing the Emerson Sensi thermostat․ Most 24V heating and cooling systems are compatible, including forced air, heat pump (without auxiliary heat control), and radiant systems․ However, certain systems may require additional considerations․
The Sensi thermostat generally does not support line voltage systems (110V or 220V) or systems with proprietary communication protocols․ If you have a millivolt system or a system requiring a C-wire, verify compatibility using Emerson’s online compatibility checker or consult a qualified HVAC professional․
A ‘C-wire’ (common wire) is often required for consistent power․ If your system lacks a C-wire, a Sensi Common Wire Kit can be used, but proper installation is essential․ Confirm your system’s voltage and wiring configuration before proceeding to avoid damage or malfunction․

Installation Process
Begin by carefully removing your old thermostat base and mounting the Sensi base plate securely using the provided screws․
Then, connect the wires, paying close attention to RC and RH separation․
Removing Your Old Thermostat Base
Before starting, ensure power is completely disconnected at the breaker box to avoid electrical shock․ Carefully remove the cover of your existing thermostat to expose the wiring․ It’s crucial to photograph the wiring configuration before disconnecting anything – this serves as a vital reference during the Sensi installation․
Disconnect the wires one at a time, labeling each wire with the corresponding terminal designation (R, W, G, Y, C, etc․)․ Use the provided labels or create your own; Once all wires are disconnected, carefully remove the old thermostat base from the wall․ You may need to unscrew it or gently pry it loose․
Inspect the wall for any damage and address it before proceeding․ Ensure the surface is clean and level for proper mounting of the Sensi base plate․ Discard the old thermostat base responsibly, following local regulations․
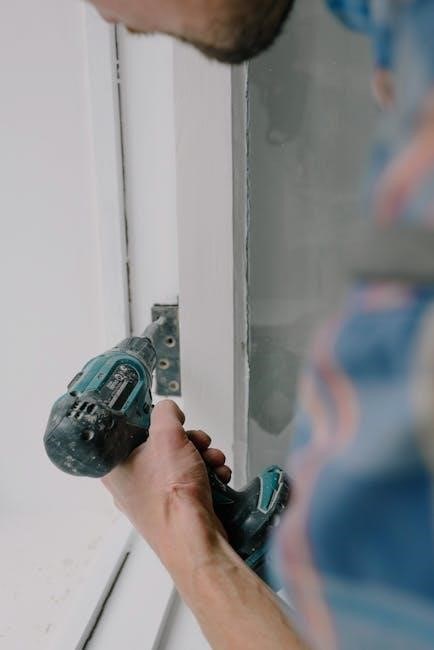
Mounting the Sensi Base Plate
Position the Sensi base plate on the wall where the old thermostat was located, ensuring it’s level․ Use a level to confirm accurate placement․ Utilize the mounting screws provided with the Sensi thermostat kit to securely fasten the base plate to the wall․
If the existing screw holes don’t align, you may need to drill new pilot holes․ Use appropriate wall anchors if drilling into drywall to ensure a stable and secure mount․ Avoid over-tightening the screws, as this could damage the base plate or the wall․
Double-check that the base plate is firmly attached and doesn’t wobble․ A secure base is essential for proper thermostat operation and prevents potential issues down the line․ Ensure sufficient space around the base plate for wire connections and the Sensi thermostat faceplate․

Connecting the Wires: RC and RH Separation
Carefully label the wires designated as RC and RH before proceeding – this is a crucial step for correct installation․ Clip the jumper wire located on the back of the Sensi faceplate․ This separation is essential as the Sensi thermostat requires distinct RC and RH connections for optimal functionality․

Connect the RC wire to the RC terminal on the Sensi base plate and the RH wire to the RH terminal․ Ensure each wire is securely inserted into its corresponding terminal, avoiding any loose connections․ A firm connection guarantees reliable power and communication with your HVAC system․
Double-check the wiring against your previous wiring setup and the Sensi installation guide․ Incorrect wiring can lead to system malfunctions․ If you are unsure about any wiring connections, consult a qualified HVAC technician for assistance․
Using a Common Wire Kit (If Necessary)
If your existing system lacks a dedicated Common (C) wire, a Common Wire Kit is required for the Sensi thermostat to function correctly․ The kit provides a solution to power the thermostat without draining power from other HVAC components․
Follow the kit’s instructions meticulously, as installation varies depending on the kit and your HVAC system․ Typically, the kit involves connecting a wire to the furnace control board to establish a consistent power source․ Ensure the furnace power is OFF during this process for safety․
Connect the new Common wire to the ‘C’ terminal on the Sensi base plate․ Proper installation of the Common Wire Kit is vital for avoiding issues like system instability or thermostat shutdowns․ If you’re uncomfortable with electrical work, seek professional assistance․
Sensi App Setup & Configuration
Download the Sensi Mobile App to connect your thermostat to Wi-Fi and create an account․
Register your device within the app for remote control and advanced scheduling features․
Downloading and Installing the Sensi Mobile App
The first step in configuring your Emerson Sensi thermostat is downloading and installing the official Sensi Mobile App․ This application, available for both iOS and Android devices, serves as the central hub for controlling and monitoring your home’s temperature remotely․
To download the app, simply visit the Apple App Store (for iOS users) or the Google Play Store (for Android users) and search for “Sensi․” Look for the app published by Emerson Electric Co․ and tap “Install․”
Once the app is downloaded, open it and follow the on-screen prompts․ You will be asked to grant certain permissions, such as location access (for geofencing features) and notification access (for alerts)․ Carefully review these permissions and grant them as needed to ensure full functionality․
The app is designed with a user-friendly interface, making the setup process straightforward and intuitive․ Ensure your mobile device is connected to a stable Wi-Fi network during the download and installation process․
Connecting the Sensi Thermostat to Wi-Fi
After installing the Sensi app, the next crucial step is connecting your new thermostat to your home’s Wi-Fi network․ This enables remote control and access to smart features․ Within the Sensi app, navigate to the “Add Device” or “Connect Thermostat” section․ The app will guide you through the process․
The thermostat will enter a pairing mode, typically indicated by a flashing Wi-Fi symbol on the display․ The app will then scan for available Wi-Fi networks․ Select your home network from the list and enter your Wi-Fi password when prompted․
Ensure you are connecting to a 2․4 GHz Wi-Fi network, as the Sensi thermostat may not be compatible with 5 GHz networks․ The connection process may take a few minutes․ Once connected, the Wi-Fi symbol on the thermostat will become solid, confirming a successful connection;
A stable Wi-Fi connection is essential for reliable operation․ If the connection fails, double-check your password and ensure your router is functioning correctly․
Creating a Sensi Account and Registering the Device
Once the Sensi thermostat is connected to Wi-Fi, you’ll need to create a Sensi account and register your device within the Sensi mobile app․ This account allows you to remotely control your thermostat, create schedules, and access energy usage reports․
Within the app, select the “Create Account” option and follow the on-screen instructions․ You’ll typically need to provide an email address and create a secure password․ After creating your account, you’ll be prompted to register your Sensi thermostat․
The app will likely ask for the thermostat’s model number (1F87U-42WF or 1F76U-22WFB) and potentially a unique device ID․ This information links the thermostat to your account․
Completing the registration process unlocks all the smart features of your Sensi thermostat, enabling convenient remote access and personalized climate control․ Ensure your email is verified to avoid any account access issues․

Post-Installation & Operation
After installation, familiarize yourself with manual operation, menu configurations, and troubleshooting․
The March 2016 manual details basic functionality and settings for optimal use․
Refer to the guide for resolving common issues․
Manual Operation and Basic Functionality
The Sensi thermostat offers intuitive manual control, allowing direct temperature adjustments without relying on scheduled programs․ Utilizing the clearly labeled buttons and icons, users can easily increase or decrease the setpoint temperature․ The display provides a clear readout of the current room temperature and the desired setpoint․
Basic functionality includes switching between heating, cooling, and auto modes, catering to diverse climate control needs․ In auto mode, the thermostat intelligently selects heating or cooling based on the setpoint and room temperature․ The ‘Fan’ setting allows for continuous fan operation or automatic cycling with heating/cooling․
The March 2016 Manual Operation Guide provides a detailed overview of these features, including explanations of each button’s function and how to navigate the basic settings․ Understanding these core functionalities ensures comfortable and efficient climate control, even without utilizing the advanced scheduling features of the Sensi app․
Menu Configurations and Settings
The Sensi thermostat’s menu system allows for extensive customization, tailoring the device to individual preferences and HVAC system requirements․ Accessible through the thermostat’s interface, the menu offers options for adjusting system settings, scheduling preferences, and display configurations․
Key settings include temperature display units (Fahrenheit or Celsius), swing temperature adjustment (cycle rate), and filter change reminders․ Users can also configure advanced features like smart away mode, which automatically adjusts the temperature based on occupancy detection via the Sensi app․
The March 2016 Manual Operation Guide details each menu option, providing step-by-step instructions for modification․ Proper configuration of these settings optimizes energy efficiency and ensures consistent comfort․ Exploring the menu allows users to unlock the full potential of their Sensi thermostat, maximizing its functionality and convenience․
Troubleshooting Common Installation Issues
During Sensi thermostat installation, several issues may arise․ A frequent problem involves incorrect wiring, particularly with the RC and RH wires – ensure these are properly labeled and the jumper wire is clipped on the Sensi faceplate as instructed․ Compatibility issues with certain HVAC systems can also occur; verifying compatibility before installation is crucial․
If the thermostat doesn’t power on, double-check the C-wire connection or consider using a common wire kit․ Wi-Fi connectivity problems are common; ensure a strong signal and correct password entry within the Sensi app․
The manual provides guidance on resolving these issues, and Emerson’s support website offers additional resources․ Carefully reviewing the wiring diagram and following the step-by-step instructions can prevent many common installation errors, ensuring a smooth and successful setup․

Understanding Manual Operation Guide (Version: March 2016)
The March 2016 Manual Operation Guide for the Sensi Wi-Fi Programmable Thermostat details fundamental control features․ It outlines the thermostat’s buttons and icons, providing a clear understanding of their functions for direct, on-device control․ This guide focuses on basic functionality, allowing users to adjust temperature settings and operating modes without relying solely on the mobile app․
It explains manual settings, enabling users to override scheduled programs for immediate comfort adjustments․ Furthermore, the guide details menu configurations, allowing customization of settings like temperature display units and system preferences․
This version is essential for users who prefer a hands-on approach or need to operate the thermostat independently of the app․ It serves as a valuable reference for understanding the core operational aspects of the Sensi thermostat․
Version Updates and Documentation (September 2015 Installation Guide)
The September 2015 Installation Guide represents the foundational documentation for the Sensi Wi-Fi Programmable Thermostat․ This initial release provided comprehensive instructions for the complete installation process, from pre-installation checks to final configuration․ It details the downloading of the Sensi app, a crucial step for enabling smart features and remote control․
The guide emphasizes disconnecting wires and removing the old thermostat base, highlighting safety precautions and proper wiring techniques․ It covers securing the Sensi base to the wall using the provided mounting screws, ensuring a stable installation․
While later versions have been released, this guide remains a valuable resource for understanding the original design and installation methodology․ It’s a key reference point for troubleshooting older installations or understanding the evolution of the Sensi thermostat’s setup process․