CUT 50 Plasma Cutter Manual: Article Plan
This detailed plan outlines a comprehensive guide for the CUT 50 plasma cutter, covering safety, operation, troubleshooting, and maintenance procedures for optimal performance.
The Ramsond CUT 50 is a powerful, portable, and versatile inverter dual voltage plasma cutter designed for cutting various metal types – steel, stainless steel, and aluminum. This manual serves as a crucial resource for both novice and experienced users, ensuring safe and efficient operation. Understanding its capabilities and adhering to safety guidelines are paramount.
This guide details setup, operation, troubleshooting, and maintenance, referencing the SUPER DEAL CUT50 Application Guide and HW-CUT50/HW-CUT50D series manuals. Proper calibration, as described for the digital amp display, is essential for accurate cutting.
Safety Precautions
Plasma cutting presents inherent dangers to both the operator and surrounding personnel. Strict adherence to all safety rules is non-negotiable. Before operation, thoroughly read and understand this manual. Welding and plasma cutting involve risks, demanding comprehensive safety observance. Always wear appropriate personal protective equipment (PPE), including welding helmets, gloves, and fire-resistant clothing.
Ensure adequate ventilation to avoid fume inhalation. Be mindful of fire hazards and have fire extinguishing equipment readily available. The CUT-20D/30D/40D/50D manual emphasizes these critical safety measures for responsible operation;
2.1 General Welding & Plasma Cutting Safety
General safety protocols are paramount when utilizing any welding or plasma cutting equipment. Always work in a well-ventilated area to prevent the buildup of hazardous fumes. Protect your eyes with a proper welding helmet featuring the correct shade lens. Wear appropriate gloves and fire-resistant clothing to shield skin from sparks and intense heat.
Ensure the work area is free of flammable materials. Be aware of potential electrical hazards and maintain a dry working environment. Prioritize a safe setup and consistent adherence to established welding safety guidelines.
2.2 Specific CUT 50 Safety Warnings
The CUT 50 presents unique hazards demanding specific precautions. Never operate the machine with damaged cables or a faulty torch. Ensure proper grounding to prevent electrical shock. Be mindful of the high-intensity arc and avoid direct or reflected viewing without adequate eye protection.
Always disconnect the power supply before performing any maintenance or adjustments. Confirm the air compressor delivers clean, dry air at the required pressure. Strict adherence to these warnings minimizes risks associated with the CUT 50’s powerful plasma arc.
Understanding the CUT 50 Components
The CUT 50 consists of several key components working in unison. These include the power supply, responsible for converting input voltage, and the plasma torch, delivering the arc. A crucial element is the air compressor, providing necessary compressed air for cutting. The digital display facilitates precise amperage control and calibration.
Familiarity with each part – from the air filter to the amperage adjustment knob – is essential. Understanding their function ensures safe and efficient operation of the Ramsond CUT series plasma cutter.
3.1 Machine Overview & Parts Identification
The CUT 50 plasma cutter features a robust inverter dual voltage design. Key external parts include the front panel with the digital amp display, power switch, and amperage control knob. The rear panel houses the air inlet connection and power input. Internally, the machine contains the transformer, rectifier, and control circuitry.
Identifying each component – like the air filter and torch connection – is vital. Proper understanding aids in maintenance and troubleshooting. Refer to the Ramsond CUT series manual for detailed diagrams and part numbers.
3.2 Plasma Torch Details
The CUT 50’s plasma torch is a consumable component, crucial for transferring plasma energy. It consists of the torch head, electrode, nozzle, swirl ring, and shielding cap. The electrode initiates the arc, while the nozzle focuses the plasma jet. Regularly inspect these parts for wear and tear, as they impact cut quality.
Ensure clean threads on connections. The torch cable connects to the machine, delivering power and compressed air. Proper torch maintenance, detailed in the Ramsond manual, extends its lifespan and ensures efficient cutting performance.
Setting Up the CUT 50
Proper setup is vital for safe and effective operation of the CUT 50. First, verify the power supply matches your local voltage – the unit is dual voltage capable. Next, connect a suitable air compressor, ensuring it delivers the required air pressure and flow rate as specified in the SUPER DEAL CUT50 guide.
Clean air is essential; install an air filter near the intake. Before operation, always inspect all connections for tightness and damage. Refer to the HW-CUT50D manual for detailed connection diagrams and safety precautions.
4.1 Power Supply Requirements (Dual Voltage)
The CUT 50 is designed for dual voltage operation, typically supporting both 110V and 220V input. However, always confirm the specific voltage requirements printed on the machine’s label before connecting to a power source. Incorrect voltage can cause damage and void the warranty.
Ensure the power circuit is adequately rated with the correct amperage and a functioning ground connection. The operation manual stresses the importance of safe electrical practices. A dedicated circuit is recommended to prevent overloading.

4;2 Air Compressor Connection & Requirements
The CUT 50 requires a clean, dry air source to function correctly. An air compressor delivering at least 5 CFM (cubic feet per minute) at 90 PSI is generally recommended. Ensure the compressor has a moisture trap and regulator to remove water and maintain consistent pressure.
Connect the air hose securely to the plasma cutter’s inlet fitting. Regularly check for leaks and maintain the air filter for optimal performance. The manual highlights that insufficient or contaminated air will negatively impact cut quality.
Operating the CUT 50
Proper operation of the CUT 50 begins with a thorough understanding of its controls and settings. Initial setup involves calibrating the amp display, ensuring accurate amperage readings. Adjust the amperage based on the material thickness and type – thicker materials require higher settings;
Always wear appropriate safety gear. Initiate the arc by depressing the torch trigger, maintaining a consistent travel speed for clean cuts. The manual stresses the importance of following recommended parameters for optimal results and to prevent damage.
5.1 Initial Setup & Calibration (Amp Display)
Accurate amperage display is crucial for precise cutting. To calibrate, turn the amp knob to its maximum setting – for a CUT 50, this is 50 amps. Simultaneously, adjust the digital display until it also reads 50 amps. This ensures the displayed amperage accurately reflects the output.
Before commencing any cutting, verify the calibration. Regularly check the display’s accuracy, especially after periods of inactivity or adjustments. Proper calibration contributes to consistent cut quality and prevents potential damage to the machine or workpiece.
5.2 Adjusting Cutting Parameters (Amperage)
Amperage directly influences cutting performance. Higher amperage cuts thicker materials faster, but can cause excessive heat and wider kerfs. Lower amperage is suitable for thinner metals, providing cleaner cuts with less distortion. Select the appropriate amperage based on the material type and thickness.
Refer to a cutting thickness guide for recommended amperage settings. Start with a lower setting and gradually increase it until achieving a clean, complete cut. Always prioritize safety and avoid exceeding the machine’s maximum amperage rating.
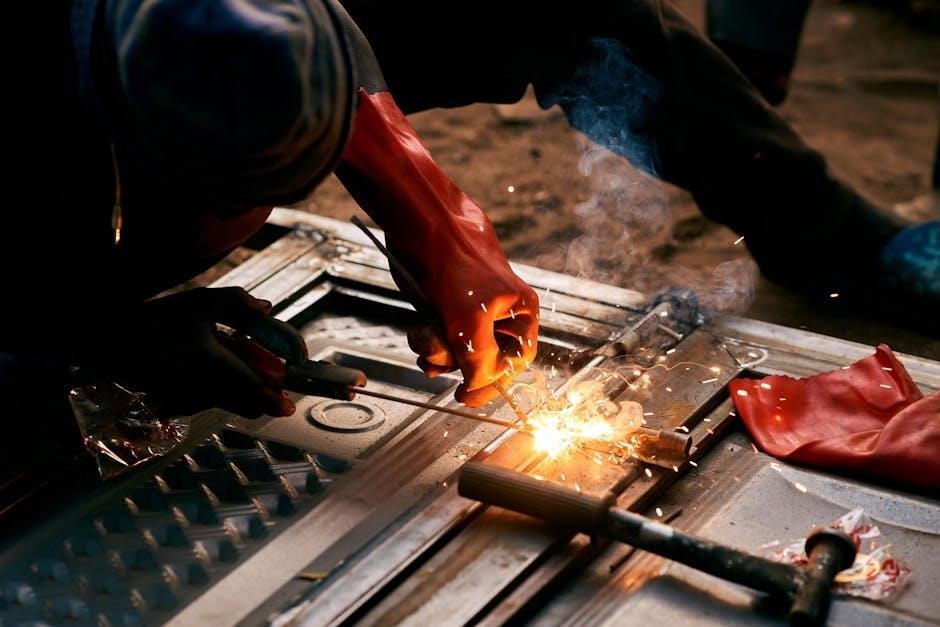
Cutting Techniques
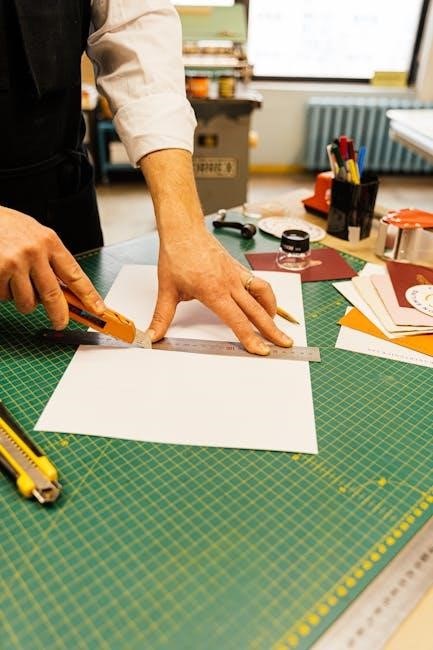
Mastering proper technique is crucial for quality cuts. Maintain a consistent travel speed and standoff distance – the gap between the torch tip and the workpiece. A stable hand and smooth motion prevent uneven cuts. For straight cuts, utilize a guide or straight edge to ensure accuracy. Practice proper torch angle; typically, a slight drag angle yields optimal results.
Always initiate the arc before moving and continue moving throughout the cut. Avoid dwelling in one spot, which can lead to material burn-through and slag buildup. Consistent practice refines these skills.
6.1 Straight Cuts & Techniques
Achieving precise straight cuts requires a steady hand and proper setup. Utilize a straight edge, clamp, or guide rail for consistent results. Maintain a constant travel speed and standoff distance throughout the cut. A slight drag angle – tilting the torch slightly in the direction of travel – often improves cut quality.
Initiate the arc before beginning the cut and maintain continuous movement. Avoid stopping or hesitating, as this can cause inconsistencies. For longer cuts, consider using a cutting chart or template for enhanced accuracy.
6.2 Cutting Different Metal Types (Steel, Stainless Steel, Aluminum)
The CUT 50 excels at cutting various metals, but parameter adjustments are crucial. Steel generally requires higher amperage and faster travel speeds. Stainless steel demands lower amperage and slower speeds to minimize heat affected zones and oxidation. Aluminum necessitates even lower amperage, precise standoff, and potentially a specialized aluminum-cutting tip.
Always test on scrap material first to dial in optimal settings. Proper air pressure and clean compressed air are vital for all materials, especially aluminum, to prevent oxidation and ensure clean cuts.
Troubleshooting Common Issues
Encountering problems? This section addresses frequent concerns. A “torch not lighting” issue often stems from a faulty air supply, incorrect gas pressure, or a worn electrode. “Poor cut quality” can result from improper amperage settings, travel speed, or a dirty workpiece. Check air filter saturation, ensuring adequate intake.
Phone cut-offs may indicate power supply issues. Always verify connections and voltage. If problems persist, consult the warranty information for support or a qualified technician.

7.1 Torch Not Lighting
A non-illuminating torch is a common issue. First, confirm the air compressor is running and delivering the correct pressure – crucial for plasma arc initiation. Inspect the torch for any obstructions or damage to the electrode and nozzle. Ensure proper connection and clean threads.
Verify the amperage is set appropriately. A worn or contaminated electrode will also prevent ignition. Check for any internal wiring faults within the torch assembly. If issues persist, consult a qualified technician.
7.2 Poor Cut Quality
Substandard cuts often stem from incorrect settings. Verify the amperage is suitable for the material thickness; too low causes incomplete cuts, while too high leads to excessive dross. Ensure consistent travel speed – slow speeds cause wider kerfs and more heat input.
Check air pressure and nozzle condition; a worn nozzle degrades arc focus. Confirm proper grounding to prevent arc instability. Material surface cleanliness is also vital; remove rust or scale for cleaner results. Adjust parameters incrementally for optimal performance.

Maintenance & Care
Regular maintenance extends the CUT 50’s lifespan and ensures optimal performance. Prioritize the air filter; clean or replace it frequently to maintain consistent air supply, crucial for cut quality. Inspect the plasma torch for worn parts – nozzles, electrodes, swirl rings – and replace as needed.
Check air lines for leaks and ensure secure connections. Clean the machine’s exterior to prevent dust buildup. Following a preventative maintenance schedule is highly recommended for long-term reliability.
8.1 Air Filter Cleaning & Replacement
Maintaining a clean air filter is paramount for consistent CUT 50 operation. A clogged filter restricts airflow, impacting cut quality and potentially damaging the machine. Regularly inspect the filter – frequency depends on usage environment. Cleaning involves gently tapping or using low-pressure compressed air (from the outside in) to remove debris.
For thorough cleaning or if the filter is damaged, replacement is necessary. Ensure the correct replacement filter is used, and follow the manufacturer’s instructions for installation.
8.2 Torch Maintenance
Proper torch maintenance extends the CUT 50’s lifespan and ensures optimal cutting performance. After each use, inspect the torch for any signs of damage – cracks, worn parts, or loose connections. Clean the nozzle and electrode regularly to remove spatter and residue, using appropriate cleaning tools.
Periodically check the swirl ring for damage and replace if necessary. Ensure the torch cable is free from kinks and abrasions. Following these steps will maintain consistent arc quality and prevent operational issues.
Advanced Features & Applications
The CUT 50 boasts a digital display offering precise amperage control and monitoring. This allows for fine-tuning cutting parameters for various materials and thicknesses. Beyond basic cutting, the CUT 50 excels in diverse projects – from automotive repair and sheet metal fabrication to artistic metalwork and DIY creations.
Its portability and dual voltage capability enhance its versatility. Explore advanced techniques like bevel cutting and stacking for increased efficiency and project complexity.
9.1 Digital Display Functionality
The CUT 50’s digital display provides real-time amperage readout, crucial for precise control during operation. Calibration is simple: adjust the amperage knob to maximum (e.g., 50 amps) and then adjust the display to accurately reflect that value.
This feature ensures consistent and accurate cuts, minimizing material waste and maximizing efficiency. The display also aids in troubleshooting, allowing operators to quickly identify potential issues with amperage settings. Accurate readings are vital for optimal performance.
9.2 Utilizing the CUT 50 for Various Projects
The SUPER DEAL CUT50 excels in diverse applications, from automotive repair and metal fabrication to DIY projects and farm maintenance. Its versatility allows cutting steel, stainless steel, and aluminum with appropriate parameter adjustments.
Users can tackle projects like creating custom metal art, repairing equipment, or building structural components. The portability of the CUT 50 makes it ideal for on-site work. Proper technique and safety precautions are essential for each project, ensuring quality results and operator safety.
CUT-20D, 30D, 40D, 50D Series Comparison
The CUT-20D, 30D, 40D, and 50D series share a core design but differ primarily in their maximum amperage output and cutting capacity. The CUT-20D is suited for lighter gauge materials, while the CUT-50D handles thicker plates effectively.
Each model is a dual voltage inverter plasma cutter, offering flexibility. Increasing amperage generally equates to increased cutting speed and thickness capability. Users should select a model based on their typical project requirements, balancing power with portability and cost considerations. All require strict adherence to safety guidelines.
Ramsond CUT Series Plasma Cutters ─ Specifics
Ramsond’s CUT series, including the CUT 50, are digital inverter air plasma cutters known for their portability and efficiency. These machines utilize DC power for cutting steel, stainless steel, and aluminum.
A key feature is the digital amp display, requiring calibration upon initial setup – adjusting it to match the selected amperage. Proper air compressor connection is crucial for optimal performance. Ramsond emphasizes clean connections and debris-free threads. Regular maintenance, like air filter checks, ensures longevity and consistent cut quality.
SUPER DEAL CUT50 Application Guide Overview
The SUPER DEAL CUT50 Application Guide provides a comprehensive resource for users, detailing features, maintenance, and safety instructions. This manual is readily available for download, offering a convenient way to access vital information.
It covers essential aspects of operation, ensuring users can maximize the cutter’s capabilities. The guide emphasizes proper setup and calibration, alongside troubleshooting common issues. Understanding the application guide is crucial for safe and effective plasma cutting, extending the lifespan of the CUT50 and ensuring quality results.
HW-CUT50/HW-CUT50D Series User Manual Highlights
The HW-CUT50/HW-CUT50D series user manual emphasizes crucial details for optimal performance and safety. A key highlight is the calibration procedure, ensuring accurate amperage readings – adjusting the display to match the maximum amperage setting (e.g., 50 amps for CUT50).
The manual also stresses the importance of proper air intake and saturation, recommending close proximity to the plasma cutter. Clean connections and debris-free threads are vital before operation. This guide provides essential instructions for maintaining and utilizing the inverter DC plasma cutting machine effectively.
Understanding “Cut” Prepositions & Phrases (Related to Cutting)
The preposition “cut” appears in numerous phrases relevant to plasma cutting and general usage. Examples include “cut up” (to shred), “cut in” (to interrupt), “cut off” (to disconnect), and “cut down” (to reduce). Understanding these nuances is helpful.
Phrases like “cut across” suggest a direct path, while “cut at” implies an aggressive action. In the context of the CUT 50, a “cut-off” might refer to power interruption. Recognizing these phrases enhances comprehension of instructions and troubleshooting guides related to the plasma cutter’s operation.
CUT 50 vs. Plasma 40FV ─ Feature Comparison
Comparing the CUT 50 to the Plasma 40FV reveals key differences. The Plasma 40FV is an inverter plasma cutter, portable and single-phase, with ventilation. It cuts steel, stainless steel, and aluminum in direct current (DC).
The CUT 50, while also an inverter, often boasts higher amperage capabilities for thicker materials. Both are designed for efficient metal cutting, but the 40FV’s portability might be favored for field work, while the CUT 50’s power suits heavier-duty applications. Choosing depends on specific project needs.
Saturation & Air Intake Considerations
Maintaining optimal air saturation is crucial for CUT 50 performance. The manual highlights that for proper saturation, the air intake should be positioned as closely as possible to the plasma cutter itself. This minimizes moisture and contaminants entering the system, which can negatively impact cut quality and torch longevity.
Ensure a clean and dry air supply; a dedicated air compressor with a filter is recommended. Insufficient saturation leads to unstable arcs and inconsistent cuts, while contaminants cause premature wear.
Troubleshooting Phone Cut-Off (Related to Power Issues)
A “phone cut-off” scenario, referencing power disruptions, can occur with the CUT 50. This typically indicates an issue with the power supply or circuit breaker. Verify the input voltage matches the machine’s requirements (dual voltage capability exists). Check for tripped breakers or blown fuses in both the machine and the power source.
Ensure proper grounding to prevent electrical hazards. If problems persist, consult a qualified electrician. Power fluctuations can damage the inverter, so a stable power source is essential.
Calibration Procedure ⎻ Detailed Steps
Accurate amperage display is crucial for optimal cutting. To calibrate the CUT 50’s digital amp display, turn the amperage knob to its maximum setting (e.g., 50 amps for the CUT 50 model). Then, carefully adjust the display reading until it precisely matches the set amperage.
This ensures the displayed amperage accurately reflects the actual cutting power. Regularly check calibration, especially after heavy use or if inconsistencies are observed. Proper calibration enhances cut quality and prevents damage.
Cutting Thickness Guide (Material Specific)
The CUT 50’s cutting capacity varies by material. For steel, it effectively cuts up to ½ inch (12.7mm). Stainless steel typically yields clean cuts up to ⅜ inch (9.5mm). Aluminum cutting is best within a range of ¼ inch (6.35mm) for optimal results.
Exceeding these recommended thicknesses can lead to incomplete cuts or reduced cut quality. Always test on scrap material first to confirm appropriate settings and technique for each specific metal type and thickness.
Preventative Maintenance Schedule
Regular maintenance extends the CUT 50’s lifespan. Daily, check air filter for debris. Weekly, inspect the plasma torch for wear and clean the nozzle. Monthly, thoroughly examine air hoses for leaks and ensure secure connections.
Every three months, replace the air filter and inspect the electrode. Annually, a professional inspection is recommended. Consistent upkeep prevents issues like torch failure and poor cut quality, ensuring reliable operation and maximizing the machine’s investment value.
Warranty Information & Support
The CUT 50 plasma cutter comes with a standard one-year manufacturer’s warranty covering defects in materials and workmanship. This warranty doesn’t cover misuse, abuse, or normal wear and tear.
For warranty claims or technical support, contact the retailer or Ramsond directly. Their website provides FAQs, downloadable manuals, and contact information. Prompt support ensures quick resolution of any issues, maximizing uptime and customer satisfaction. Register your machine online to activate the warranty promptly.

Frequently Asked Questions (FAQ)
Q: Why won’t my torch light? A: Ensure proper air pressure and a clean air filter. Check the electrode and nozzle for wear.
Q: What amperage should I use for 1/2” steel? A: Refer to the cutting thickness guide; typically, 35-45 amps are suitable.
Q: My cut quality is poor. What could be the issue? A: Adjust amperage, travel speed, and ensure a stable air supply. A worn nozzle also impacts cut quality.