
Electrolux Washer Instruction Manual: A Comprehensive Guide
Welcome! This manual details the operation and maintenance of your Electrolux washer, including models like the EFLS627S and EIFLW50LIW, ensuring optimal performance․
Understanding Your Electrolux Washer Model
Your Electrolux washer, whether a recent model like the 2018 EFLS627S or the IQ Touch EIFLW50LIW, represents a commitment to advanced laundry technology․ These front-load washers are rigorously tested, as demonstrated by Consumer Reports’ evaluations, focusing on performance and efficiency․
Familiarizing yourself with your specific model’s features – building upon the strengths of predecessors like the EFLS617S – is crucial․ This guide will help you unlock its full potential, ensuring clean, fresh laundry with every cycle․
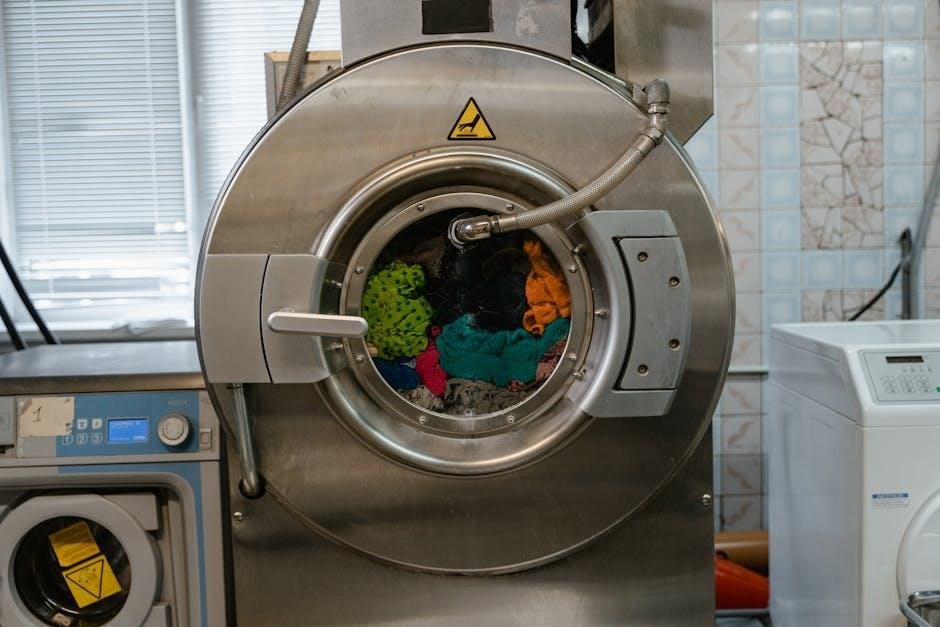
Identifying Key Components
Essential parts of your Electrolux washer include the drum, responsible for washing clothes, and the detergent dispenser, crucial for effective cleaning․ The control panel, featuring buttons and indicators, manages wash cycles․
Additionally, locate the water supply connection, drainage hose, and leveling feet; Understanding these components – found in models like the EFLS627S and EIFLW50LIW – is vital for proper installation, operation, and maintenance, ensuring longevity and optimal performance․
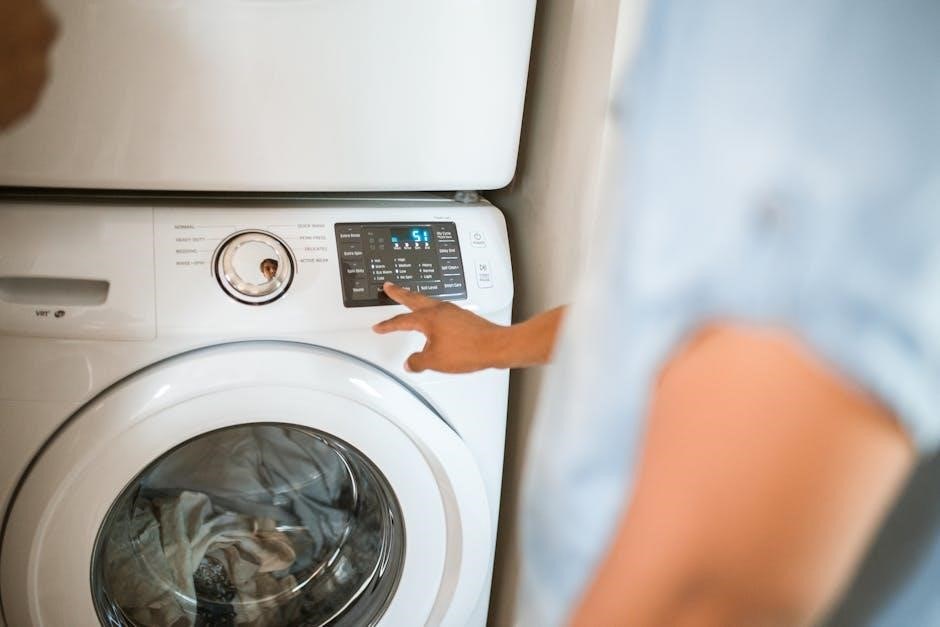
Control Panel Overview
The Electrolux washer’s control panel is your command center․ It features a digital display and various buttons for cycle selection, temperature adjustment, and spin speed control․ Indicators illuminate to show the selected settings and cycle progress․
Familiarize yourself with the power button, start/pause button, and option buttons for features like steam wash (available on some models like the EFLS627S) and sanitize cycles, ensuring efficient operation․
Buttons and Indicators Explained

The Power button initiates or deactivates the washer․ Start/Pause begins or interrupts a cycle․ Cycle Selector allows choosing wash programs like Normal, Delicates, or Quick Wash․ Temperature adjusts water heat, while Spin Speed controls the final spin intensity․
Indicators display cycle status – washing, rinsing, spinning – and alert you to errors․ The IQ-Touch interface (on models like EIFLW50LIW) offers intuitive control and program selection․

Initial Setup and Installation

Carefully unpack your Electrolux washer, removing all shipping materials․ Inspect for any damage․ Position the washer near water supply and drain connections․ Ensure a stable, level floor․ Connect the water supply hoses securely, checking for leaks․ Attach the drainage hose properly to prevent water overflow․
Leveling is crucial for quiet operation; adjust the feet until stable․ Before first use, run an empty cycle to flush the system․
Water Supply Connection
Connect the inlet hoses to both the hot and cold water faucets․ Ensure a tight, secure fit to prevent leaks during operation․ Use new hoses; do not reuse old ones․ Check that the water pressure is within the recommended range (typically 20-120 psi)․
Slowly open the faucets to check for leaks at the hose connections and the washer inlets․ Tighten connections if necessary․
Drainage Hose Installation
Securely insert the drainage hose into a standpipe with a diameter of at least 1․97 inches․ The standpipe should be positioned at a height between 30 and 96 inches from the floor․ Avoid excessive bending or kinking of the hose, as this can restrict water flow․
Ensure the hose is firmly secured to prevent it from slipping out during the drain cycle․ Proper installation prevents water damage and ensures efficient drainage․
Leveling the Washer
Proper leveling is crucial to minimize vibration and noise during operation․ Use a spirit level on the top of the washer, checking both front-to-back and side-to-side․ Adjust the leveling feet, rotating them clockwise to lower the washer and counterclockwise to raise it․
Continue adjustments until the washer is perfectly level and stable․ A securely leveled washer will operate more efficiently and extend its lifespan, preventing unnecessary wear․
Operating Instructions: Basic Wash Cycles
Your Electrolux washer offers several pre-programmed cycles for various fabric types․ The Normal/Cotton cycle is ideal for everyday laundry, providing robust cleaning․ For delicate items, select the Delicates/Hand Wash cycle, utilizing a gentler wash action․
Need a quick refresh? The Quick Wash cycle efficiently cleans lightly soiled items in a shorter timeframe․ Always consult the garment care label before selecting a cycle․
Normal/Cotton Cycle
The Normal/Cotton cycle is designed for durable, everyday fabrics like cotton and linen․ This cycle utilizes a combination of robust washing action and a moderate spin speed to effectively remove dirt and stains․ It’s perfect for items like t-shirts, jeans, and bed sheets․
For optimal results, avoid overloading the washer․ Select a water temperature appropriate for the fabric type and color․ Consider using a standard detergent for best cleaning performance․
Delicates/Hand Wash Cycle
The Delicates/Hand Wash cycle provides gentle care for fragile items like lingerie, silk, and hand-washables․ This cycle uses a slow wash action and a low spin speed to minimize stretching and damage․ It’s ideal for items requiring extra attention․
Always use a delicate detergent and consider placing delicate items inside a mesh laundry bag for added protection during the wash cycle․ Avoid using hot water with this setting․
Quick Wash Cycle
The Quick Wash cycle is designed for lightly soiled items that need a refresh․ This cycle completes a full wash in a significantly shorter timeframe – typically around 15-30 minutes – making it perfect for small loads or when you’re short on time․
While convenient, remember that the Quick Wash cycle uses less water and a shorter wash action, so it’s best suited for items that don’t require heavy-duty cleaning․
Advanced Wash Options
Electrolux washers offer a range of advanced options to customize your wash․ These include precise Temperature Selection, allowing you to choose the ideal water temperature for different fabrics and soil levels․ Furthermore, Spin Speed Control lets you adjust the spin cycle intensity, minimizing wrinkles or maximizing water extraction․
Finally, Soil Level Adjustment enables you to tailor the wash intensity to the dirtiness of your load, optimizing cleaning performance and resource usage․
Temperature Selection
Electrolux washers provide versatile Temperature Selection options for optimal fabric care․ Choose from Hot, ideal for whites and heavily soiled items, Warm for most colored fabrics, and Cold to preserve colors and reduce energy consumption․
Cold Wash is particularly effective with modern detergents․ Always check garment care labels before selecting a temperature, ensuring the best cleaning results and preventing damage to your clothes․
Spin Speed Control
Electrolux washers offer adjustable Spin Speed Control, impacting moisture removal and fabric care․ High Spin extracts more water, reducing drying time, but may cause more wrinkles․ Medium Spin balances efficiency and wrinkle reduction․
Low or No Spin is best for delicate items to minimize stretching or damage․ Consider fabric type when selecting a spin speed; heavier items benefit from higher speeds․
Soil Level Adjustment
Electrolux washers feature Soil Level Adjustment, allowing you to customize wash intensity․ Select Heavy Soil for heavily soiled items like work clothes or gardening wear, extending wash time and agitation․
Normal Soil is suitable for everyday laundry, while Light Soil is ideal for lightly worn or refreshed items․ Adjusting the soil level optimizes cleaning performance and water usage, ensuring effective results․
Detergent and Additive Usage
Electrolux washers are designed for use with High Efficiency (HE) detergents only․ Using non-HE detergents will create excessive suds, potentially damaging the machine and voiding the warranty․
Always follow the detergent manufacturer’s instructions regarding dosage․ Fabric softener and bleach can be added to the designated dispensers, ensuring proper dilution and timing during the wash cycle․ Avoid overfilling dispensers․
Types of Detergent Compatible with Electrolux Washers
Electrolux washers require High Efficiency (HE) liquid detergents․ Powdered HE detergents are also acceptable, but ensure complete dissolution to prevent residue․ Pods are convenient, but use caution to avoid over-sudsing․
Standard detergents create too many suds and can damage the internal components․ Avoid detergents containing fabric enhancers or bleach alternatives directly in the drum; utilize the dispensers provided for optimal results․
Detergent Dispenser Guide
Locate the detergent dispenser drawer, typically on the front of the washer․ It’s usually divided into three compartments․ The compartment marked “I” or with a symbol resembling a detergent bottle is for the main wash detergent․
The compartment labeled “II” is for fabric softener, and the one marked with a bleach symbol is for chlorine bleach․ Always dilute liquid chlorine bleach with water before adding it to the dispenser․
Fabric Softener and Bleach Usage
When using fabric softener, do not exceed the maximum fill line indicated in the dispenser compartment․ Overfilling can cause dispensing issues and residue on clothes․ For bleach, always dilute liquid chlorine bleach with water before pouring it into the designated compartment․
Never pour bleach directly onto fabrics, as this can cause discoloration․ Avoid using bleach and ammonia together, as this creates dangerous fumes․
Troubleshooting Common Issues
Encountering problems? This section addresses frequent concerns․ If your washer isn’t starting, check the power cord and ensure the door is securely latched․ For drainage issues, inspect the drain hose for kinks or clogs․
Pay attention to error codes displayed – E1, E2, and E3 signify specific malfunctions․ Consult the full error code list within this manual for detailed explanations and potential solutions before contacting service․
Washer Not Starting
Is your Electrolux washer failing to initiate a cycle? First, verify the power cord is firmly plugged into a functioning outlet․ Ensure the washer door is completely closed and latched; a loose latch prevents operation․
Check your home’s circuit breaker or fuse box for tripped breakers or blown fuses․ If these are all correct, consult the error code display for further diagnostic clues before seeking assistance․
Washer Not Draining
Encountering issues with your Electrolux washer not draining? Begin by checking the drain hose for any kinks or obstructions that might be blocking water flow․ Confirm the drain hose isn’t inserted too far into the drainpipe, as this can cause siphoning․
Inspect the drain pump filter for lint, debris, or small objects․ A clogged filter is a common cause of drainage problems; clear it carefully before restarting․
Error Codes and Their Meanings (E1, E2, E3 etc․)
Your Electrolux washer utilizes error codes to diagnose issues․ An ‘E1’ code typically indicates a water supply problem – check the inlet hoses․ ‘E2’ often signals a drainage issue, requiring inspection of the drain hose and pump filter․
Code ‘E3’ may point to a temperature sensor malfunction․ Refer to the complete error code list in the full manual for a comprehensive understanding of each code and recommended solutions․
Cleaning and Maintenance
Regular cleaning extends your washer’s lifespan and maintains performance․ Periodically clean the drum using a washer cleaner, running a hot water cycle․ The detergent dispenser should be removed and rinsed monthly to prevent buildup․
Wipe down the exterior with a damp cloth․ Inspect and clean the door seal to prevent mold․ Proper maintenance ensures efficient operation and prevents unpleasant odors․
Drum Cleaning
Maintaining a clean drum is crucial for optimal washing performance and preventing odors․ Run a dedicated drum cleaning cycle monthly, or more frequently with heavy use․ Utilize a commercially available washer cleaner, following package instructions carefully․
Alternatively, use white vinegar – add two cups to the dispenser and run a hot water cycle․ Wipe the drum interior after the cycle completes to remove any residue․
Dispenser Cleaning
Regularly cleaning the detergent, fabric softener, and bleach dispensers prevents buildup and ensures proper dispensing․ Remove the dispenser drawer (refer to your model’s specific instructions) and rinse thoroughly with warm water․
Use a soft brush to remove any lingering residue from compartments․ Ensure all parts are completely dry before reinserting the drawer․ A clogged dispenser can affect wash results!
Exterior Cleaning
To maintain your Electrolux washer’s appearance, clean the exterior with a damp, soft cloth and mild detergent․ Avoid abrasive cleaners, as they can scratch the surface․
Pay attention to the control panel and door, wiping away any spills or residue promptly․ Dry the exterior thoroughly after cleaning to prevent water spots․ Regular cleaning keeps your washer looking its best!
Safety Precautions
Prioritize safety when using your Electrolux washer․ Always disconnect the power supply before cleaning or maintenance․ Keep children away from the washer during operation, utilizing the Child Lock feature to prevent accidental changes․
Adhere to all Electrical Safety Guidelines, avoiding contact with water while handling the power cord․ Never attempt to repair the washer yourself; contact qualified personnel for assistance․
Child Lock Feature
Protect curious hands with the Child Lock feature! This essential safety function prevents unintended operation of your Electrolux washer․ To activate, typically press and hold two specific buttons simultaneously – consult your model’s specific instructions for the correct combination․
The indicator light will illuminate, confirming activation․ Repeat the process to deactivate, restoring normal control․ This feature is crucial for households with young children, ensuring safe operation․
Electrical Safety Guidelines
Prioritize safety when installing and using your Electrolux washer! Always ensure the appliance is properly grounded via a dedicated, appropriately rated electrical outlet․ Never use extension cords or adapters․ Avoid operating the washer with a damaged power cord; replace it immediately․
Do not attempt self-repair of electrical components․ Disconnect the power supply before cleaning or performing maintenance․ Keep the area around the washer dry to prevent electrical hazards․
Specific Model Features (EFLS627S, EIFLW50LIW)
The EFLS627S, released in 2018, builds upon the popular EFLS617S, offering enhanced features for superior cleaning․ The EIFLW50LIW, tested by Consumer Reports, demonstrates robust performance within their washing machine evaluation program․
Each model boasts unique wash cycles and options․ Refer to the following sections for detailed instructions specific to your Electrolux washer, maximizing its capabilities and ensuring optimal laundry results․
EFLS627S Specific Instructions
The EFLS627S retains beloved features from its predecessor, the EFLS617S, while introducing notable improvements․ Familiarize yourself with the IQ-Touch controls for precise cycle selection․ This model excels in stain removal and fabric care, offering a range of specialized wash programs․
Consult the full cycle guide for optimal settings․ Ensure proper detergent usage to leverage the EFLS627S’s advanced cleaning technology for consistently fresh laundry․
EIFLW50LIW Specific Instructions
The EIFLW50LIW, as tested by Consumer Reports, demonstrates excellent performance in washing machine evaluations․ This IQ Touch model offers a variety of wash cycles designed for diverse fabric types and soil levels․ Pay close attention to load size recommendations for optimal cleaning efficiency․
Utilize the control panel to customize wash programs and achieve desired results․ Regular maintenance, as outlined in this manual, will prolong the lifespan of your EIFLW50LIW․
Understanding Wash Programs
Electrolux washers feature specialized wash programs to cater to various needs․ The Steam Wash function effectively penetrates fabrics, loosening dirt and stains for a deeper clean, while minimizing wrinkles․ The Sanitize Cycle utilizes higher temperatures to eliminate bacteria and allergens, ideal for bedding and baby clothes․
Explore each program’s settings to optimize cleaning performance based on fabric type and soil level, ensuring exceptional results every time․
Steam Wash Functionality
Electrolux’s Steam Wash utilizes the power of steam to deeply penetrate fabrics, loosening dirt and stubborn stains more effectively than traditional water washing․ This process also helps to reduce wrinkles, saving you time on ironing․
The steam cycle is particularly beneficial for delicate items and heavily soiled laundry, providing a gentle yet powerful cleaning experience․ Select the Steam Wash option for enhanced results!
Sanitize Cycle Details
The Sanitize cycle employs elevated water temperatures to eliminate bacteria and allergens, providing a hygienic clean for items like bedding, baby clothes, and towels․ This cycle is ideal for households with sensitivities or concerns about germs․
Ensure proper detergent usage for optimal sanitization․ The cycle duration is longer due to the higher temperature requirements, guaranteeing thorough disinfection and peace of mind for your laundry needs․
Energy Efficiency Tips
Maximize energy savings by washing full loads whenever possible, utilizing the cold water wash option – it cleans effectively while reducing energy consumption significantly․ Select the appropriate spin speed; higher speeds use more energy․
Regularly clean the lint filter to maintain optimal performance and reduce strain on the motor․ Consider using energy-efficient detergents and avoid overusing them, as excess suds require extra rinsing․
Warranty Information
Your Electrolux washer is covered by a limited warranty against defects in materials and workmanship․ The standard warranty typically lasts for one year from the date of original purchase, covering parts and labor․
Extended warranties are often available for purchase, offering additional coverage for a longer period․ Please retain your proof of purchase and refer to the separate warranty document included with your appliance for complete details and claim procedures․