Understanding knife sharpening angles is crucial for achieving optimal performance․ A 20-degree angle, sharpened equally on both sides (totaling 40 degrees), is generally recommended for kitchen knives․
Why Knife Angle Matters
The angle at which a knife is sharpened directly impacts its cutting ability and edge retention․ A smaller angle, like 15 degrees, creates a sharper, more delicate edge ideal for slicing, commonly found on Japanese knives․ Conversely, a larger angle, such as 25 degrees, forms a more durable, robust edge suited for tougher tasks, often seen on outdoor or pocket knives․
Maintaining the correct angle ensures efficient cutting and prevents premature dulling․ Incorrect angles lead to either a fragile edge that chips easily or a thick, ineffective edge that struggles to cut cleanly․ Precision in angle selection is therefore paramount for optimal knife performance․
Understanding Blade Geometry
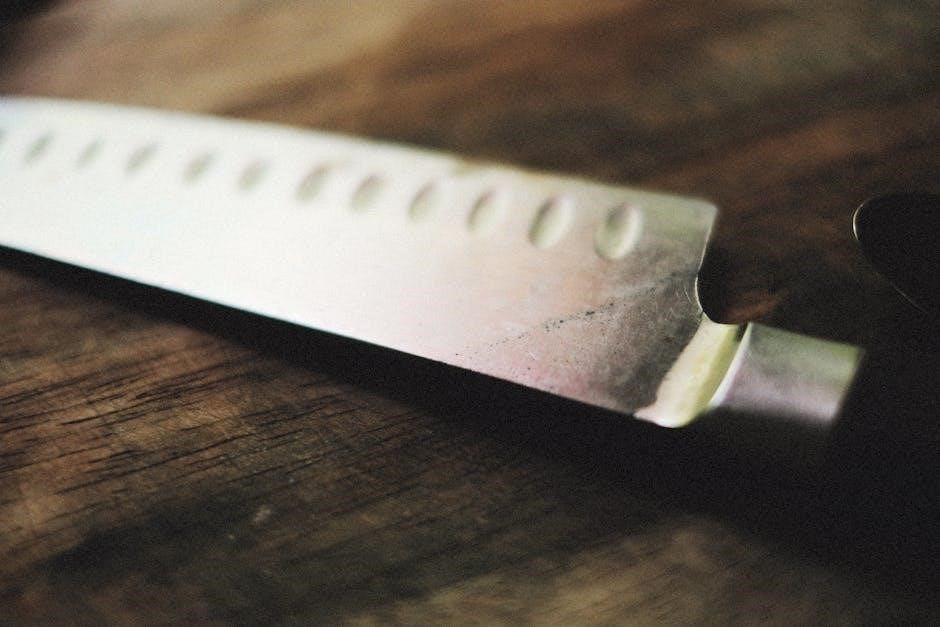
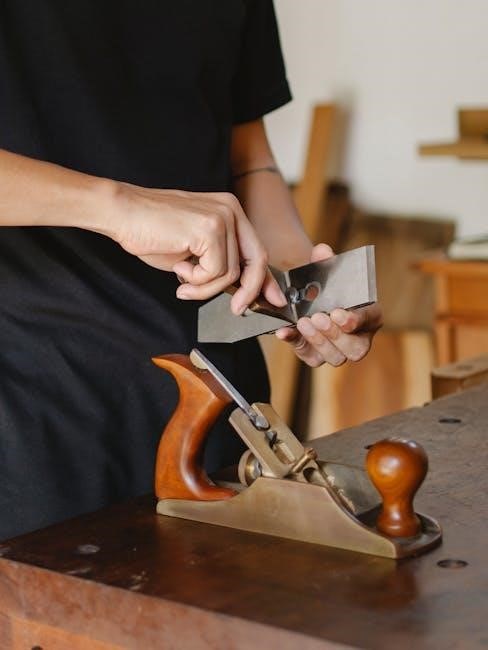
Knife blades aren’t simply flat pieces of steel; their geometry significantly influences cutting performance․ The ‘shoulder’ of the blade, where the bevel meets the body, is critical․ Rounding this shoulder diminishes sharpness and edge stability․ The ‘edge’ itself, formed by the angle, determines how easily the knife penetrates materials․
Different blade types employ varying geometries․ Japanese blades often feature thinner profiles and acute angles for precision slicing, while Western blades prioritize durability with thicker profiles and wider angles․ Recognizing these geometric nuances is vital for selecting the appropriate sharpening angle and technique․
Common Knife Types and Their Ideal Angles
Various knives require specific angles for optimal sharpness․ Japanese knives typically use 15 degrees, while Western knives benefit from a 20-degree edge for versatility․
Japanese Knives (15-Degree Angle)
Traditional Japanese knives, renowned for their exceptional sharpness and delicate slicing ability, are typically sharpened to a 15-degree angle on each side․ This creates a very acute edge, ideal for precision work like preparing sashimi or finely chopping vegetables․ Maintaining this angle requires skill and practice, often utilizing water stones for a refined finish․
The shallower angle results in a thinner, more fragile edge compared to Western knives․ Therefore, Japanese blades often necessitate more frequent honing and careful handling to prevent chipping or rolling․ Achieving and preserving this 15-degree angle is key to unlocking the full potential of these exquisite blades․
Western Knives (20-Degree Angle)
Generally, Western-style knives benefit from a 20-degree sharpening angle per side, resulting in a robust 40-degree inclusive angle․ This angle strikes a balance between sharpness and durability, making these knives suitable for a wider range of kitchen tasks․ They can handle tougher ingredients and withstand more demanding use than their Japanese counterparts․
A 20-degree edge is more forgiving and less prone to chipping, making it a practical choice for everyday cooking․ Sharpening can be achieved with various tools, including oil stones and guided systems, offering a more accessible sharpening experience for home cooks seeking reliable performance․
Utility and Paring Knives (20-Degree Angle)
Like many Western-style kitchen knives, utility and paring knives typically thrive with a 20-degree sharpening angle on each side, creating a 40-degree inclusive edge․ This angle provides a good balance between sharpness for detailed work and durability for handling various fruits, vegetables, and smaller cutting tasks․
Maintaining this angle ensures these smaller knives remain effective for precise cuts and peeling․ Consistent sharpening at 20 degrees will prolong the life of the edge and reduce the frequency of needing more extensive re-profiling․ It’s a versatile angle for everyday kitchen use․
Chef’s Knives (20-Degree Angle)
The workhorse of the kitchen, the chef’s knife, generally performs best with a 20-degree sharpening angle per side, resulting in a 40-degree inclusive edge․ This angle strikes a balance between a keen, sharp edge for efficient slicing and chopping, and sufficient durability to withstand frequent use and contact with cutting boards․
Maintaining this angle is vital for consistent performance․ A 20-degree edge allows the chef’s knife to handle a wide range of ingredients, from delicate herbs to tough root vegetables, making it a truly versatile tool; Regular sharpening at this angle is key․
Bread Knives (22-25 Degree Angle)
Bread knives, with their serrated edges, require a slightly more robust sharpening angle than many other kitchen knives․ A range of 22 to 25 degrees per side is typically recommended, creating a more durable edge capable of tackling crusty bread without excessive deformation․ This angle prioritizes strength over extreme sharpness․
Sharpening a bread knife focuses on refining the serrations, not creating a continuous, razor-sharp edge․ Maintaining this angle ensures the knife continues to effectively saw through bread without crushing it․ Consistent sharpening is crucial for optimal slicing performance․
Pocket Knives & Outdoor Knives (25-30 Degree Angle)
Pocket and outdoor knives demand a more durable edge due to their varied and often demanding uses․ A sharpening angle of 25 to 30 degrees per side is ideal, providing a balance between sharpness and edge retention․ This robust angle withstands tougher tasks like cutting rope, wood, or preparing food in the field․
The increased angle minimizes chipping and rolling of the edge, crucial when encountering abrasive materials․ Maintaining this angle consistently ensures the knife remains reliable in challenging environments․ Regular sharpening is vital for safety and performance during outdoor activities․
The 40-Degree Angle Concept
The 40-degree angle represents the inclusive angle of the blade, achieved by sharpening at 20 degrees on each side, creating a strong, versatile edge․
Total Angle Calculation (20 Degrees per Side)
Determining the total blade angle involves understanding that the stated angle, like 20 degrees, typically refers to the angle maintained on each side of the blade․ This isn’t the overall angle of the edge itself․ To calculate the inclusive edge angle, you simply add the angles from both sides together․ Therefore, sharpening at 20 degrees per side results in a total inclusive angle of 40 degrees․
This 40-degree angle is a common benchmark for many Western-style kitchen knives, offering a balance between sharpness and durability․ It’s vital to consistently maintain this angle during sharpening to achieve a reliable and effective cutting edge․ Accurate angle maintenance is key to a successful sharpening process․
Implications of a 40-Degree Inclusive Angle
A 40-degree inclusive angle, achieved by sharpening at 20 degrees per side, creates a robust and versatile edge․ This angle provides a good balance between sharpness for slicing and durability for handling tougher tasks․ Blades sharpened to this angle are less prone to chipping or rolling compared to those with more acute angles․
However, it’s not the sharpest possible edge․ Knives intended for delicate slicing, like Japanese blades, often utilize smaller angles․ The 40-degree angle is a practical choice for everyday kitchen knives, offering reliable performance and requiring less frequent sharpening than more acute edges․
Tools for Achieving Accurate Angles
Various tools aid precise sharpening, including sharpening stones (water and oil), guided systems, and angle guides with protractors, ensuring consistent blade geometry․
Sharpening Stones (Water Stones & Oil Stones)
Sharpening stones, available as water stones or oil stones, are foundational tools for honing a blade’s edge․ Water stones utilize water as a lubricant, creating a slurry that aids in material removal and produces a finer polish․ They typically sharpen faster but wear down quicker․ Oil stones, conversely, employ oil for lubrication, offering slower sharpening but increased stone longevity․
Selecting the appropriate grit is vital; coarser grits tackle reshaping, while finer grits refine the edge․ Maintaining the correct angle—typically 20 degrees for Western knives—requires practice and consistency․ Proper technique involves even pressure and overlapping strokes to achieve a uniform, sharp edge․ Regular flattening of the stone ensures a consistently even surface․
Guided Sharpening Systems
Guided sharpening systems offer a consistent angle, simplifying the sharpening process, especially for beginners․ These systems typically utilize clamps or slots to hold the blade at a predetermined angle—often 20 degrees for general kitchen knives—reducing the learning curve associated with freehand sharpening․
Various models exist, from manual pull-through systems to powered options․ While potentially less versatile than freehand methods, they deliver reliable results with minimal effort․ Consistent pressure and following the system’s instructions are key․ They are excellent for maintaining a consistent edge and are particularly useful for those struggling with angle control․
Angle Guides and Protractor Tools
For those preferring freehand sharpening, angle guides and protractor tools provide valuable assistance in maintaining consistency․ These tools attach to the blade, establishing a visual or physical reference for the desired sharpening angle – commonly 20 degrees for Western knives․
They help develop muscle memory and improve technique over time․ Protractor-style guides allow precise angle setting, while simpler guides offer a fixed angle․ Utilizing these tools alongside sharpening stones or steels enhances accuracy and reduces the risk of rounding the blade’s shoulder, ultimately leading to a sharper, more durable edge․
Sharpening Techniques for Specific Angles
Mastering specific angles requires practice; 15-degree techniques suit Japanese blades, while 20-degree methods are ideal for Western knives, ensuring optimal sharpness and edge retention․
Freehand Sharpening (15-Degree)
Achieving a precise 15-degree angle freehand demands significant skill and consistent practice․ This technique, commonly used for Japanese knives, requires maintaining a very shallow angle between the blade and the sharpening stone․ Begin by establishing a stable stance and a firm grip on the knife․
Visualize the 15-degree angle – it’s quite acute! Slowly draw the blade across the stone, applying gentle pressure․ Focus on keeping the angle consistent throughout the entire stroke․ Regularly check your progress, and remember to alternate sides to create a symmetrical edge․ Patience is key, as mastering this technique takes time and dedication․
Freehand Sharpening (20-Degree)
Mastering the 20-degree freehand sharpening technique is fundamental for Western-style knives, offering a balance between sharpness and durability․ Begin with a secure grip and stable stance, visualizing the angle․ Draw the blade across the sharpening stone, maintaining consistent, light pressure․
The 20-degree angle is more forgiving than 15-degrees, making it easier for beginners․ Focus on keeping the blade’s edge aligned with the stone throughout each stroke․ Alternate sides regularly, ensuring even sharpening․ Consistent practice builds muscle memory, leading to a refined and consistently sharp edge․
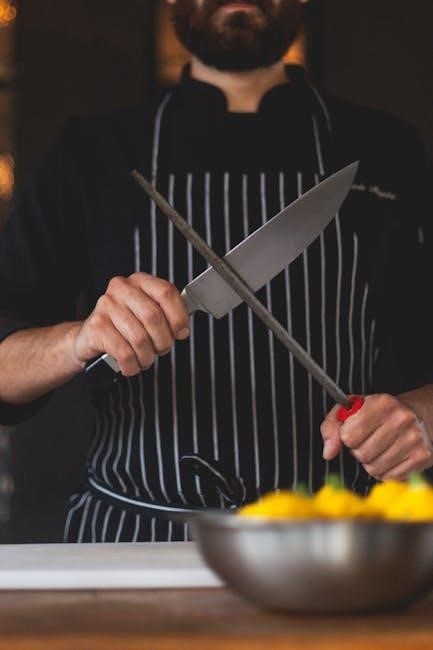
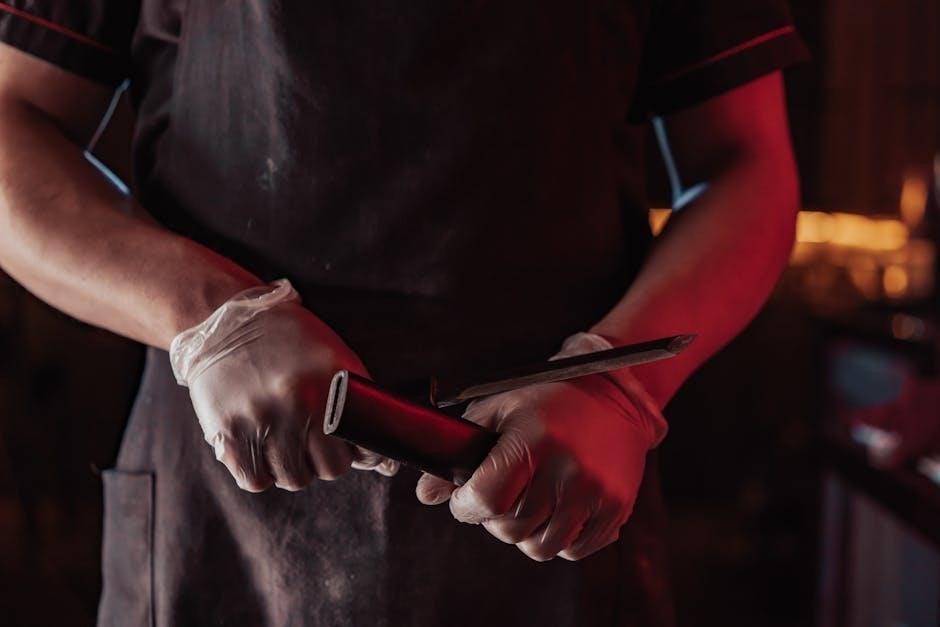
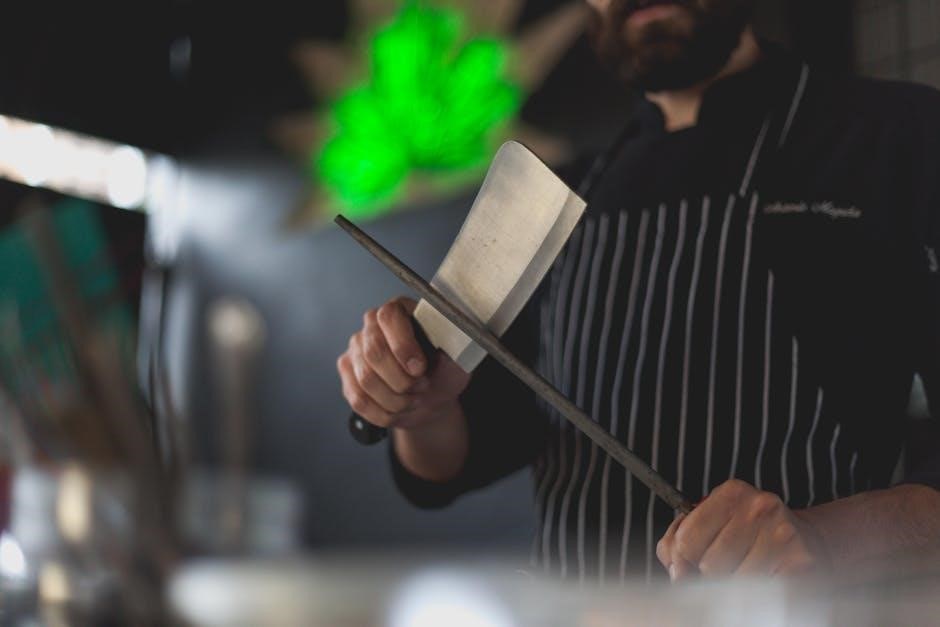
Using a Sharpening Steel (Maintaining Angles)
A sharpening steel doesn’t truly sharpen but realigns the blade’s edge, maintaining the existing angle – typically 20-degrees for most kitchen knives․ Hold the steel vertically and establish a consistent angle with the blade․
Draw the blade down and across the steel, applying light pressure․ Alternate sides with each stroke, maintaining the angle throughout․ This process straightens microscopic bends in the edge, restoring sharpness․ Regular honing with a steel, before or after each use, significantly extends the time between full sharpenings, preserving your knife’s performance․
Determining Your Current Blade Angle
Visually inspect the blade’s existing bevel or use the tape and marker method to reveal the angle․ This helps replicate the original geometry during sharpening․
Visual Inspection Method
Carefully examine the blade’s edge, holding it up to a light source․ Observe the angle at which the bevel – the sloped surface leading to the cutting edge – is formed․ This requires a keen eye and some experience, but it’s a quick initial assessment․
Look for how much metal is removed from the original factory edge․ A steeper angle will have a more pronounced bevel, while a shallower angle will appear more subtle․ Compare your knife to known angles if possible․ This method provides an estimate, not a precise measurement, but it’s a valuable starting point for understanding your blade’s current geometry before sharpening․
Tape and Marker Method
Apply a strip of painter’s tape along the blade’s edge, ensuring it covers the bevel․ Use a permanent marker to color the entire edge․ Then, gently drag the blade across a sharpening stone at your desired angle․ Observe the marker removal pattern․
If the marker is removed evenly across the entire edge, you’ve achieved the correct angle․ Uneven removal indicates an incorrect angle – adjust accordingly and repeat․ This method provides a visual representation of your sharpening angle, allowing for precise adjustments and consistent results․ It’s a practical way to refine your technique․
Troubleshooting Common Sharpening Issues
Common problems include rounding the blade’s shoulder or creating an inconsistent edge․ Maintaining a consistent angle throughout the sharpening process is vitally important․
Rounding the Shoulder of the Blade
Rounding the shoulder, the area where the blade meets the bolster, signifies applying too much pressure or using an incorrect sharpening angle․ This creates a weak spot, diminishing the knife’s durability and cutting ability․ Avoid excessive downward force during sharpening; instead, prioritize maintaining a consistent angle․
Focus on light, controlled passes․ If rounding occurs, you may need to reshape the shoulder using a coarser stone, carefully restoring the original geometry․ Prevention is key – practice consistent technique and regularly assess your angle to avoid this common sharpening issue․ Correcting rounded shoulders requires patience and precision․
Inconsistent Edge
An inconsistent edge arises from fluctuating sharpening angles throughout the process, resulting in varying levels of sharpness along the blade’s length․ This manifests as some sections cutting effectively while others struggle․ Maintaining a stable angle is paramount; utilize guides or practice freehand technique diligently․
Regularly check your progress, feeling for uniformity along the edge․ If inconsistencies develop, revisit the entire blade with a consistent angle, focusing on the weaker areas․ Correcting an inconsistent edge demands patience and a keen awareness of your sharpening motion․ Consistent practice builds muscle memory․
Difficulty Maintaining the Angle
Struggling to hold a consistent angle is a common challenge for beginners․ Freehand sharpening requires significant practice to develop the necessary muscle memory and spatial awareness․ Guided systems offer a solution, providing a fixed angle for consistent results․
If freehand sharpening, focus on establishing a visual reference point and maintaining a slow, deliberate motion; Regularly check your angle against a guide․ Don’t rush the process; accuracy trumps speed․ Consistent practice, even in short bursts, will improve your ability to maintain the desired angle over time․
Advanced Sharpening Considerations
Mastering burr formation, removal, and polishing elevates sharpness․ Stropping refines the edge for ultimate performance, demanding precision and understanding of blade steel properties․
Burr Formation and Removal
During sharpening, a microscopic “burr” forms – a thin, raised edge of metal․ This indicates the steel is being effectively removed and reshaped․ Initially, it’s crucial to establish a consistent burr along the entire blade length․ Removing this burr is paramount for achieving true sharpness; simply stropping won’t eliminate a substantial burr․
Techniques include alternating sides with progressively lighter pressure, or utilizing a dedicated burr-removing stone․ Improper burr removal leads to inconsistent edges and reduced cutting performance․ Patience and a delicate touch are key to a refined, razor-sharp result, ensuring a clean and lasting edge․
Polishing the Edge
After burr removal, polishing refines the edge, enhancing its sharpness and longevity․ This involves using increasingly finer grit stones or polishing compounds․ Polishing doesn’t create the edge, but rather smooths microscopic imperfections left from sharpening․ It minimizes friction during cutting, resulting in cleaner slices and reduced resistance․
Stropping, using leather loaded with polishing compound, is a common final step․ Consistent, light pressure is vital; excessive force can round the apex․ A well-polished edge exhibits a subtle sheen and delivers superior cutting performance, maximizing the knife’s potential․
Stropping for Final Sharpness
Stropping is the ultimate refinement, aligning the microscopic teeth of the blade for peak sharpness․ Employing a leather strop – often with polishing compound – it removes the final burr and polishes the edge․ Maintaining the original sharpening angle during stropping is paramount; typically 15-20 degrees․
Draw the blade away from the cutting edge across the strop, using light pressure․ Multiple passes, alternating sides, build a razor-sharp finish․ Stropping doesn’t remove metal like sharpening, but rather hones and aligns, extending sharpness between full sharpenings․ It’s a crucial step for professional results․

Impact of Steel Hardness on Angle Choice
Softer steels benefit from lower angles (15-20°) for easier sharpening, while harder steels require higher angles (20-25°) to resist rolling․
Softer Steels (Lower Angles)
Knives crafted from softer steels, possessing lower Rockwell hardness ratings, generally require a more acute sharpening angle, typically falling within the 15 to 20-degree range․ This is because softer steel is more prone to deformation and rolling of the edge during use․ A lower angle creates a thinner, more refined edge, enhancing initial sharpness․
However, this comes with a trade-off: the edge will dull more quickly and require more frequent sharpening․ The reduced hardness means the steel doesn’t resist wear as effectively․ Therefore, prioritizing ease of sharpening and a very keen edge is ideal for softer steel blades, accepting the need for more maintenance․
Harder Steels (Higher Angles)
For knives forged from harder steels – those with higher Rockwell hardness – a more obtuse sharpening angle, generally between 20 and 25 degrees, is recommended․ These steels exhibit greater resistance to wear and deformation, allowing for a more durable, albeit slightly less acutely sharp, edge․
A higher angle distributes the force across a wider surface area, preventing the edge from rolling or chipping as easily during demanding tasks․ While initial sharpening may require more effort, the resulting edge will retain its sharpness for a significantly longer period, reducing the frequency of maintenance needed․
Sharpening Angles for Different Tasks
Knife angle selection depends on intended use; lower angles excel at slicing, while higher angles are better suited for push cutting and tackling heavier-duty chopping tasks․
Push Cutting vs․ Slicing
The distinction between push cutting and slicing significantly impacts the ideal knife sharpening angle․ Slicing, like preparing delicate fish or tomatoes, benefits from a shallower angle – typically around 15-20 degrees․ This creates a thinner, more acute edge, minimizing resistance and allowing for smooth, clean cuts through softer materials․
Conversely, push cutting, often employed when chopping vegetables or disjointing meat, demands a more robust edge․ A steeper angle, generally 20-25 degrees, provides increased durability and prevents the edge from rolling over under pressure․ Choosing the correct angle optimizes performance for each specific cutting technique, ensuring both sharpness and longevity․
Heavy Duty Cutting
For tasks involving heavy-duty cutting, such as processing large game, batoning wood, or tackling fibrous materials, a significantly higher sharpening angle is paramount․ Angles ranging from 25 to 30 degrees, and sometimes even higher, are recommended to maintain edge integrity under substantial stress․
A steeper angle creates a thicker, more durable edge that resists chipping and rolling․ While sacrificing some slicing finesse, this robustness ensures the knife can withstand forceful impacts and prolonged use․ Pocket knives and outdoor survival blades frequently employ these higher angles, prioritizing strength over extreme sharpness in demanding environments․

Maintaining Sharpness Between Sharpenings
Regular honing realigns the blade’s edge, while proper storage protects it․ These practices extend sharpness, reducing the frequency of full sharpening sessions needed․
Honing vs․ Sharpening
Honing and sharpening are often confused, yet they serve distinct purposes in knife maintenance․ Honing, performed with a honing steel, doesn’t remove metal; instead, it realigns the microscopic teeth of the blade’s edge that bend over with use․ This restores a feeling of sharpness, but doesn’t actually create a new edge․
Sharpening, conversely, does remove metal to reshape the blade and create a new, keen edge․ It’s necessary when honing no longer restores sharpness, indicating actual metal loss․ Think of honing as straightening, and sharpening as rebuilding․ Consistent honing minimizes the need for frequent, more aggressive sharpening․
Proper Knife Storage
Protecting your freshly sharpened knives through proper storage is paramount to maintaining their edge․ Avoid tossing knives loosely into drawers, as this causes friction and dulls the blade․ Ideal storage solutions include knife blocks, magnetic strips, or individual sheaths․
Knife blocks offer secure slots, preventing blade-on-blade contact․ Magnetic strips keep knives visible and readily accessible while safeguarding the edge․ Sheaths are excellent for travel or individual blade protection․ Proper storage minimizes wear and tear, extending the time between necessary sharpenings․
Resources for Further Learning
Explore online guides and workshops to deepen your sharpening skills․ Kyoku Knives and other sources offer comprehensive charts and classes for blade mastery․
Online Sharpening Guides
Numerous websites provide detailed knife sharpening guides, catering to all skill levels․ These resources often feature visual aids, step-by-step instructions, and videos demonstrating proper technique for achieving specific angles․ Kyoku Knives, for example, offers a comprehensive chart detailing ideal angles for Japanese and Western blades․
Many guides emphasize the importance of consistent angle maintenance throughout the sharpening process․ Others delve into specific sharpening methods, like freehand sharpening or using guided systems․ Algebra Calculator and similar sites, while not directly knife-focused, demonstrate the importance of precision – a skill transferable to sharpening․ Exploring these online resources will significantly enhance your understanding and ability to maintain a razor-sharp edge․
Sharpening Workshops and Classes
For a more hands-on learning experience, consider attending knife sharpening workshops or classes․ These sessions, often led by experienced culinary professionals or skilled sharpeners, provide personalized instruction and immediate feedback․ They allow you to practice techniques under expert guidance, refining your angle control and overall sharpening skills․
Workshops typically cover blade geometry, angle selection based on knife type, and proper use of sharpening tools․ You’ll gain confidence in maintaining consistent angles, avoiding common pitfalls like rounding the shoulder․ These classes are invaluable for those seeking a deeper understanding beyond online guides, fostering a lasting ability to achieve and maintain a truly sharp edge․